With the vast diversity in how a particular size can appear on a woman, gathering as much reference material as possible was crucial. Several weeks spent searching for and ingesting references helped guide to key areas that ultimately found their way onto our models.
Creating an “attractive” full-body model was a huge challenge. Staying faithful to ASTM measurements, adhering to the limitations for the optimal resolution of the mesh (fewer than 23,000), and balancing the garment and simulation needs, animation and deformation needs, and geometry space deformation needs—all into one rig that accommodated three different height groups with three different sizes in both an A and D breast sizes (for a total of 23 different avatars)—was critical. Moreover, the ability to apply any motion from the animation library onto this rig was supremely important.
Back view.
Creating a single Animation Rig capable of accommodating three different height groups—five feet, five feet five inches, and five feet eleven inches—each with four sizes (00, 6, 12, and 16) and providing the option for either an A or D cup breast size, along with full facial controls, was a challenging task. Working with a contract rigger, I helped develop a robust system that could output 24 unique avatars while being able to achieve excellent results in animation.
Showing the ability to size up to 16 while also changing the breast size to a D cup.
With an agile Rigging System now complete, I shifted my focus to creating an Animation system capable of taking performance capture and retargeting it to our rig as cleanly and quickly as possible. First, I selected Xsens, now known as Movella, as the studio's performance capture solution. Utilizing the Xsens MVN Link and Animate Pro software, the performance capture results were solid. The actor in question is Jorji. I had the opportunity to work with her on several captures. Her motion, as it clearly demonstrates, is a testament to her amazing talent.
The next key workflow in the Animation System was to create a retargeting process. This process would enable me to take performance capture and cleanly retarget it to the Rigging system. Knowing that the rig's bind pose was an A-pose, I needed a method to transition the rig's FBX to a zeroed-out T-pose, aligning it with Xsens' zero frame T-pose. Having a matching T-pose and ensuring that the Rig's FBX T-pose was clean set the stage for a more accurate result of the performance capture. This approach eliminated the need for numerous offset layers to correct the delta in zero frame poses between the rig and the Xsens FBX. By importing the rig's FBX into Motionbuilder, I was able to create the T-pose and set up a Source asset from the Xsens skeleton FBX. The Source asset, the Xsens FBX, would consist only of the FBX skeleton and have no keyframed animation. It would facilitate the transfer of any Xsens FBX performance capture onto the constrained skeleton of the Avatar's rig FBX. It's important to note a few tweaks in the Xsens MVN software. I made sure that each capture started at the origin and ensured that the size of the Xsens skeleton matched our medium-height rig skeleton. The rigging system's medium-height skeleton is used in all retargeting from performance captures, and the result is added into the first of two libraries—a skeletal MoCap library in Maya.
Short video example of retargeting on rig FBX.
Upon importing the FBX back into Maya, it was time to add the skeletal motion to the Animation Libraries, more specifically to the MoCap Library. The Animation Libraries that I created were all done in Studio Library. Having worked in Studio Library on other productions, I was familiar with the strengths of this great resource and knew it would be perfect for setting up the libraries on the studio's network. A custom MEL script tool would take the hip joint of the FBX skeleton and point-constrain a camera at a certain distance and height, along with a predetermined focal length, while also hiding all visible joints. With only the mesh visible, the animator would open the MoCap Library, create or select the proper folders and/or sub-folders, and save the skeletal motion into the MoCap library. The saving process in Studio Library was straightforward, allowing for either an .mp4 reference video for motion or a .jpg still frame for capturing just a pose frame. The MoCap library was primarily created as a contingency, in case the more frequently used Animation library became damaged or data was lost.
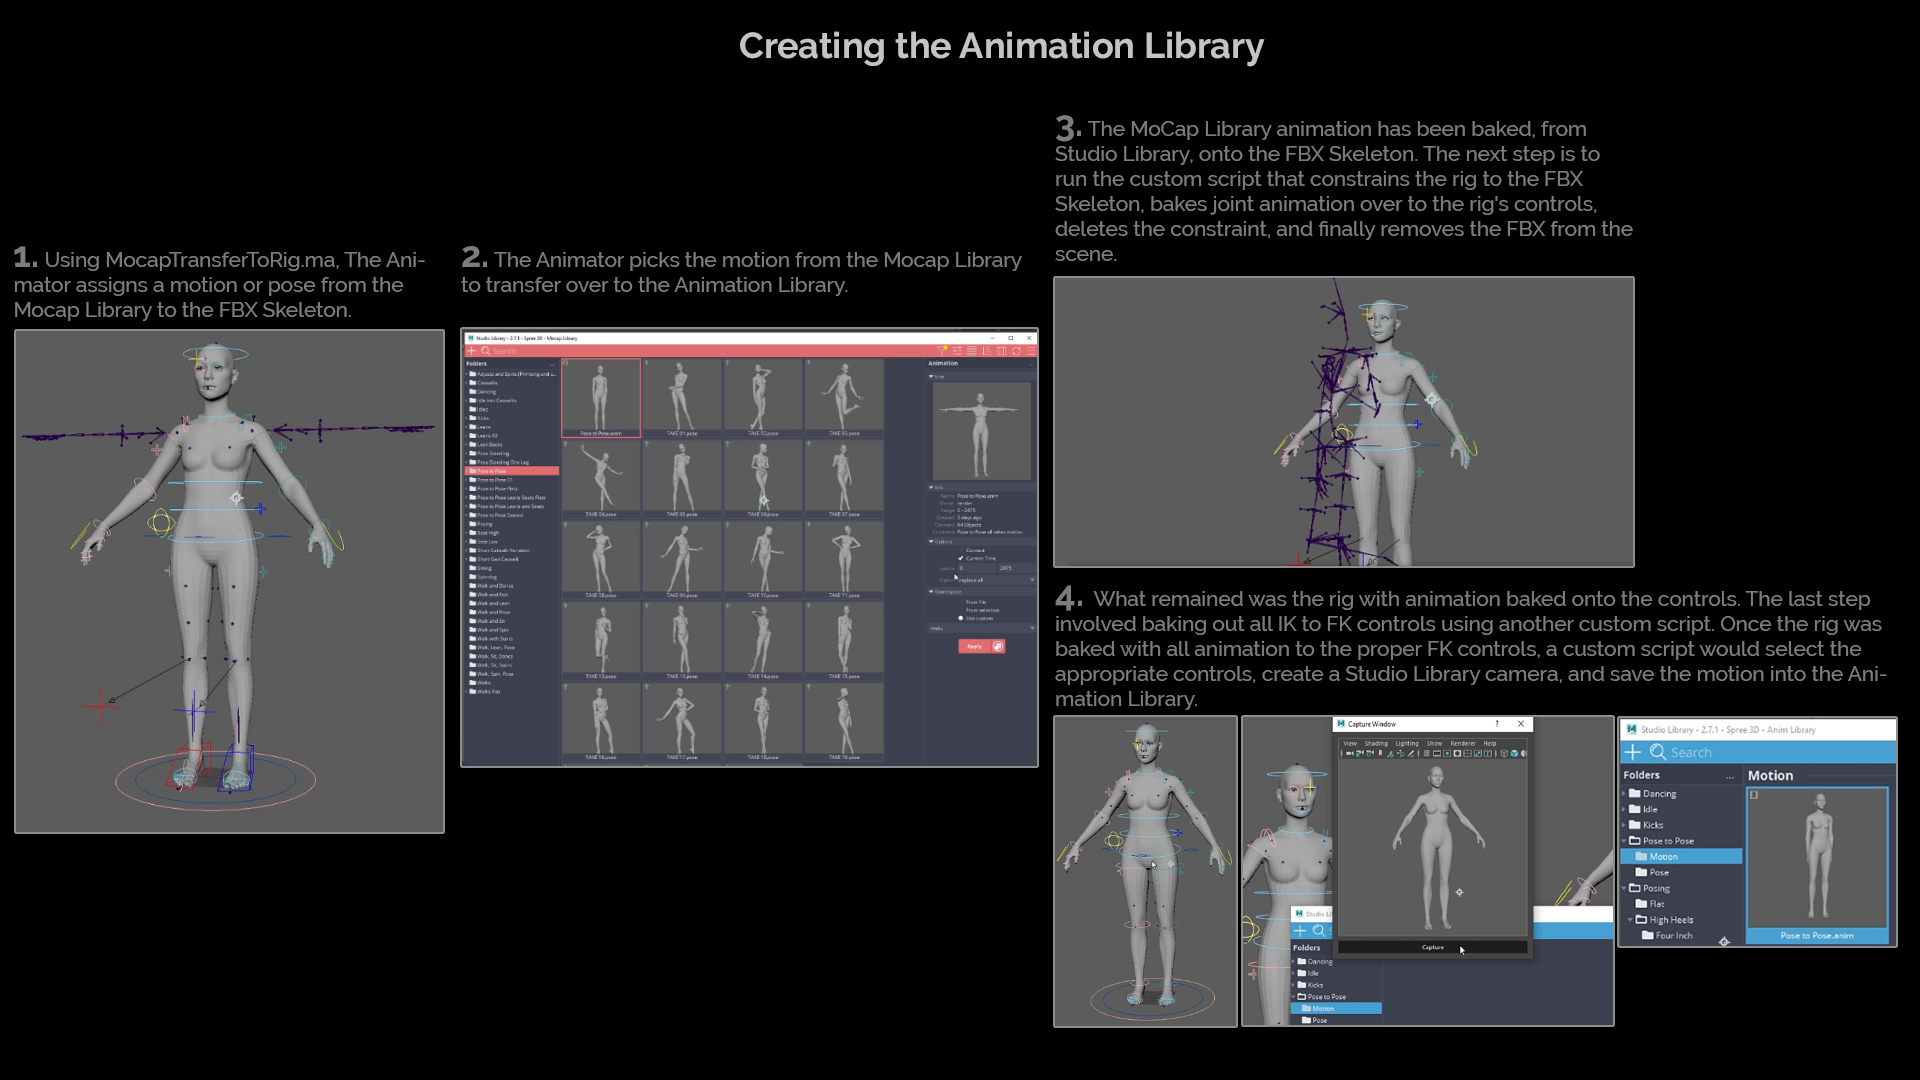
The final step of transfer involved retargeting the MoCap Library joint animation to the controls of the female rig and saving this to the Animation Library. A template Maya file, named MocapTransferToRig.ma, served as the starting point. This file included an FBX skeleton of the female rig in a T-pose and a referenced-in female rig. Upon bringing up the MoCap Library, the Animator would select a motion or pose and assign it to the FBX skeleton. With the assigned motion now baked onto the FBX skeleton, the Animator could run a custom script that would constrain the rig to the skeleton, bake the animation from the skeleton to the correct controls, delete the constraints, and finally remove the FBX skeleton from the Maya scene. What remained was the rig with animation baked onto the controls. The last step involved baking out all IK to FK controls using another custom script. Once the rig was baked with all animation to the proper FK controls, a custom script would select the appropriate controls, create a Studio Library camera, and save the motion into the Animation Library.
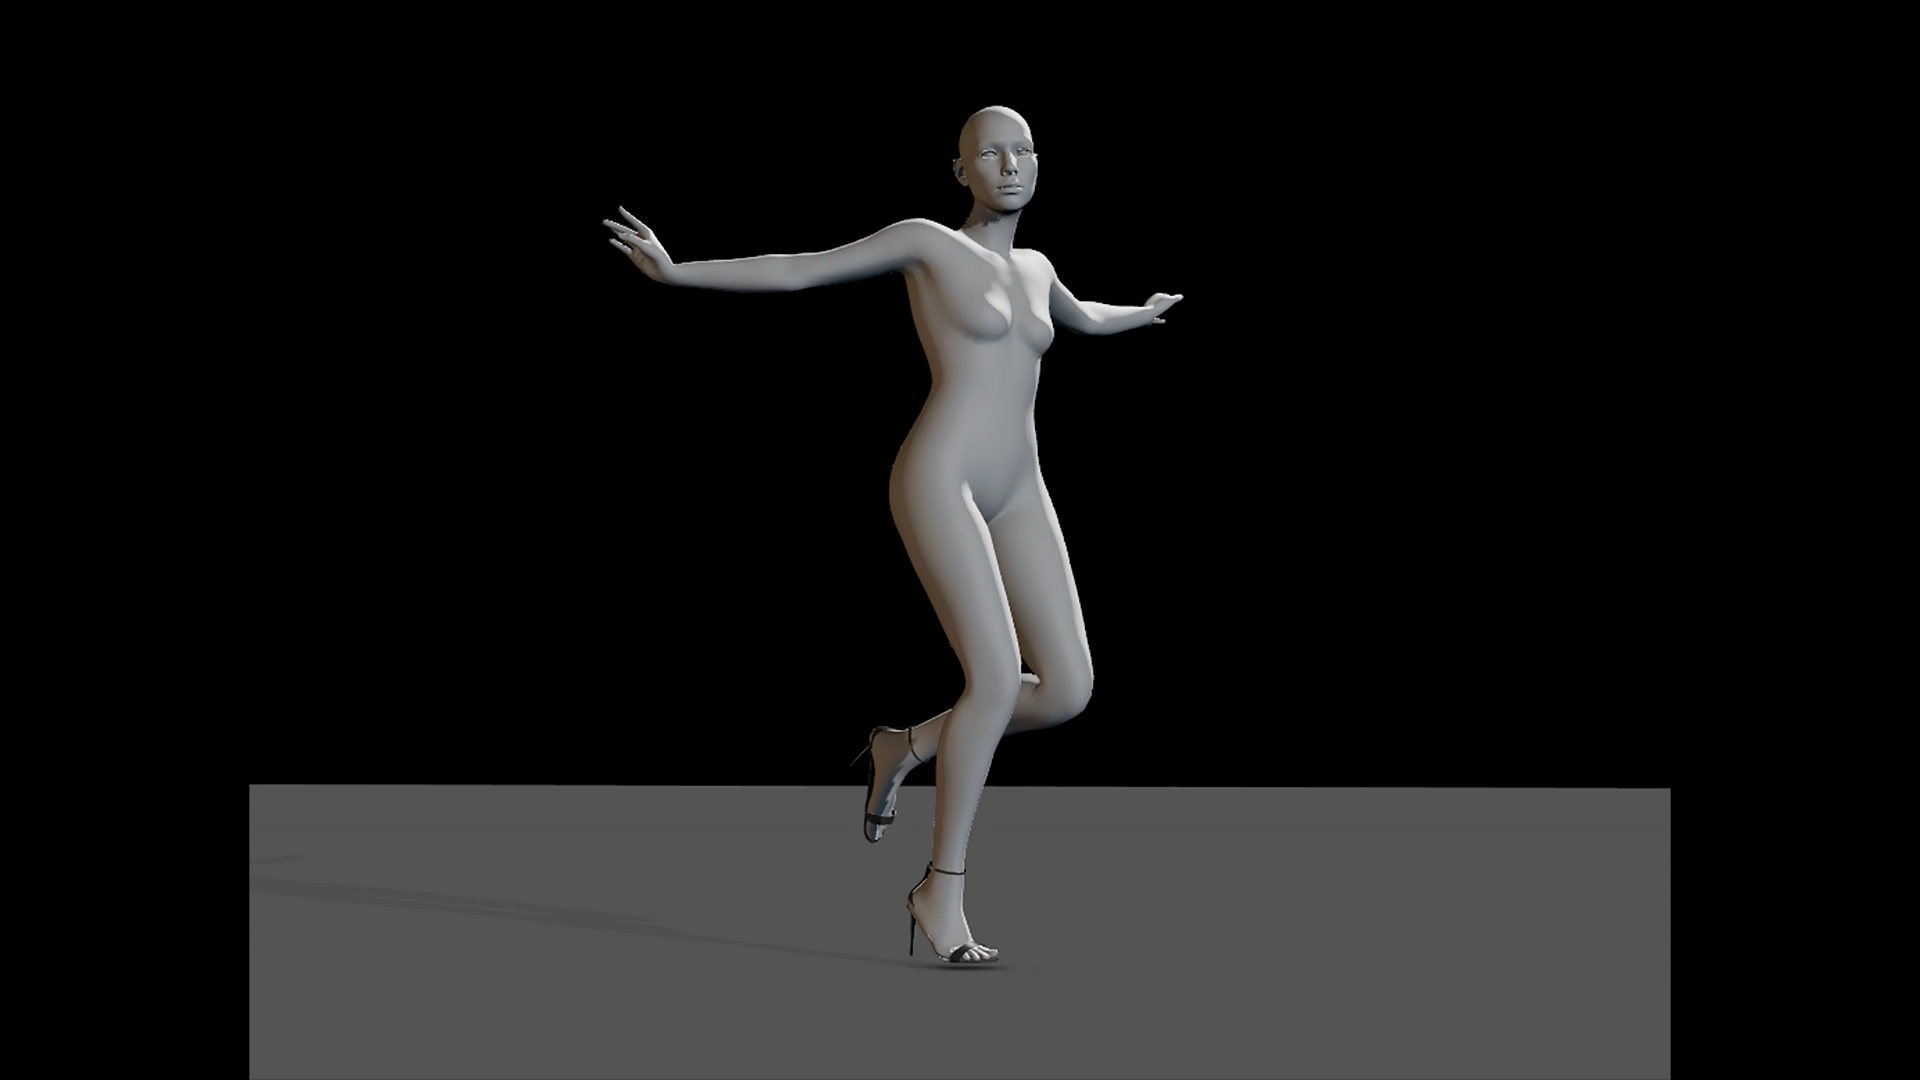
This Animation comes directly from the Animation Library. It has not been cleaned or plus’d by animation. This is a straight result from the procedures and workflow above.
I was presented with the challenging and exciting task of developing a photorealistic skin pipeline, specifically aimed at creating lifelike female avatars. Leveraging the advanced node-based system of Mari, coupled with the powerful rendering capabilities of Maya Arnold and Unreal Engine, I meticulously crafted a workflow that consistently produced highly believable and detailed skin textures. This technical endeavor involved a deep dive into nuanced shader development and texture layering, ensuring each avatar exhibited a natural and authentic appearance. The result was a series of strikingly realistic female avatars, each showcasing the intricate interplay of light and texture that truly brought them to life.
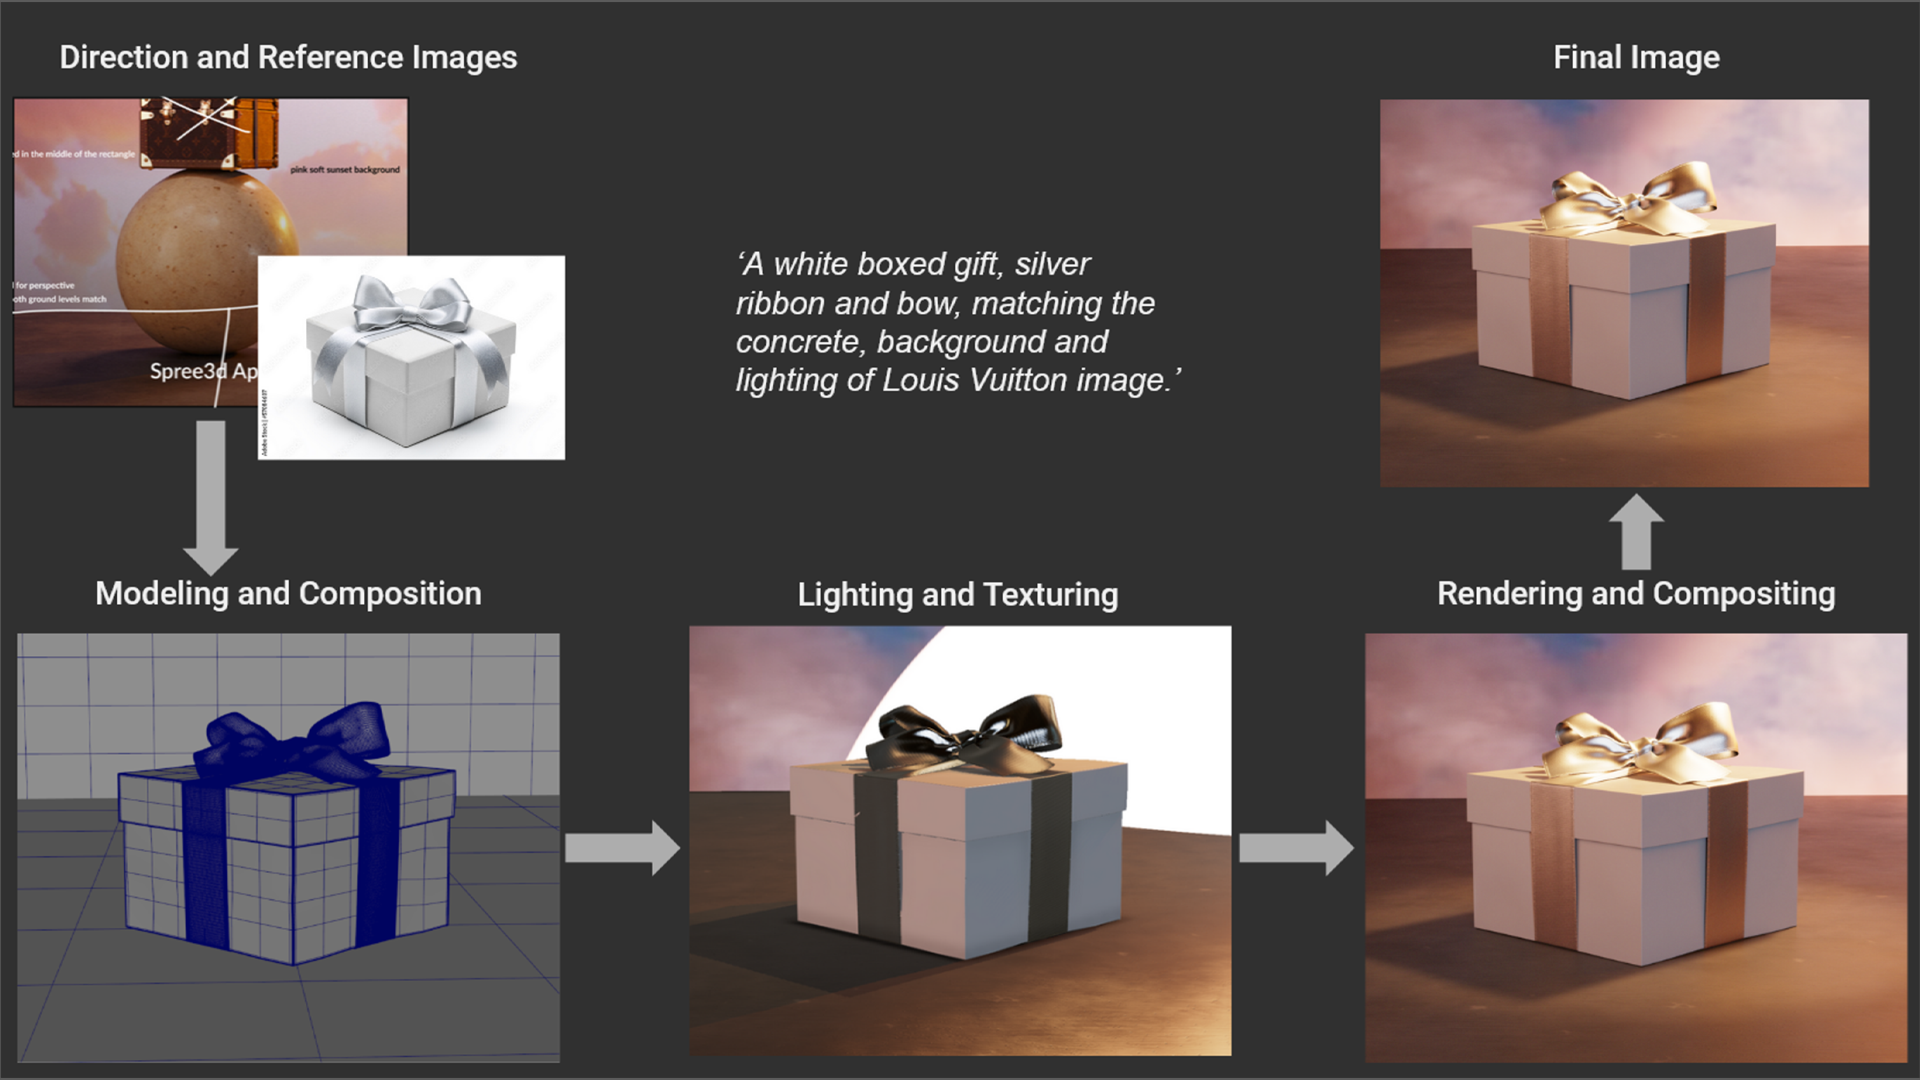
I was tasked with producing asset renders for the website. Following specific guidelines and using reference images as a basis, I efficiently delivered high-quality, photorealistic imagery that met the project's requirements.
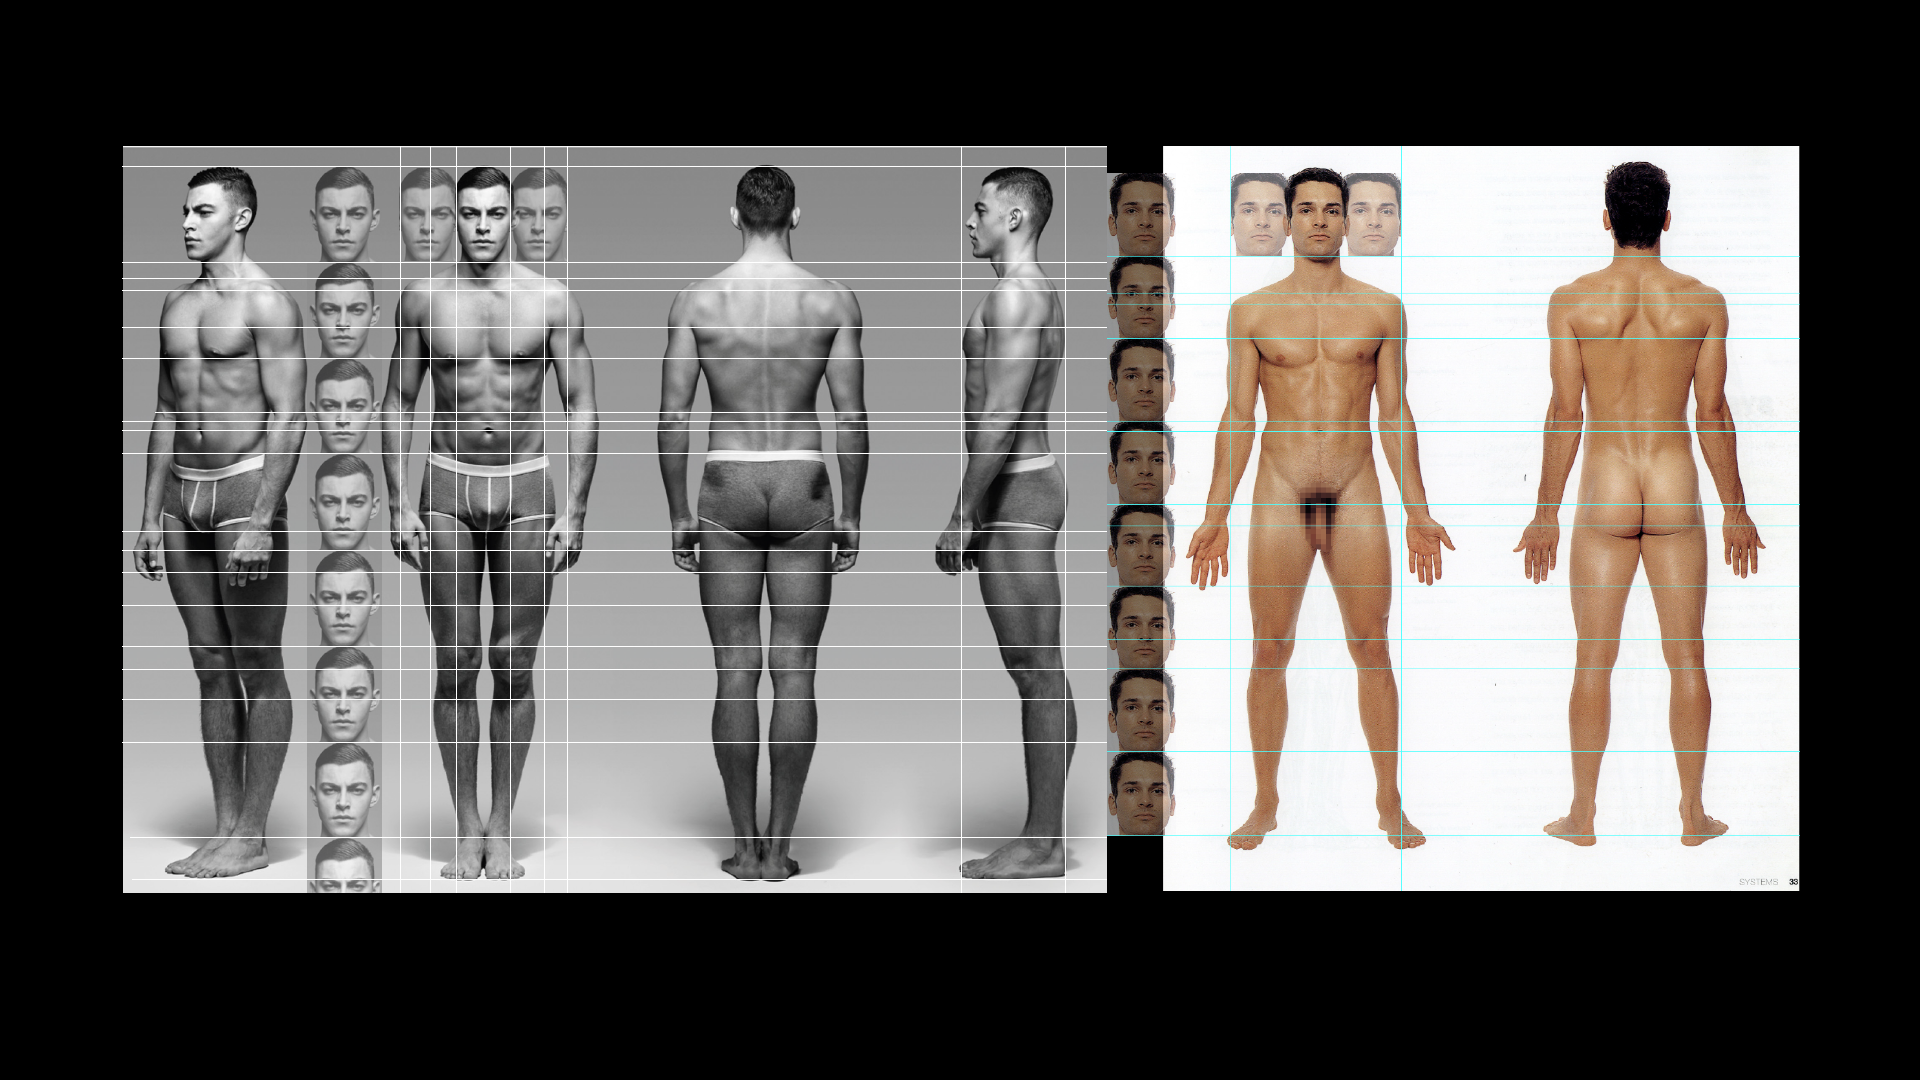
My responsibility involved revising the Male Avatar models, with a focus on establishing a visual benchmark for the ideal Male Avatar. I utilized the 7 1/2 head size ratio as a foundational guide for building accurate proportions. By meticulously adjusting proportions and details, I aimed to enhance the realism and authenticity of the Male Avatar.
Proportions, detail and size were all adjusted. using Zbrush and Maya these changes were made to better align all sizes and shapes of the Male Avatar.
These short stories were a cost-effective way to build Spree3D's brand on social media, engage with customers, and analyze metrics to inform decisions in creating a successful product. All animation was completed either through motion capture and cleanup or hand-keyed animation. The delivery for these five spots overlapped, making it imperative to have a fast, efficient system that delivered on time and met our expectations for direction and quality of animation.
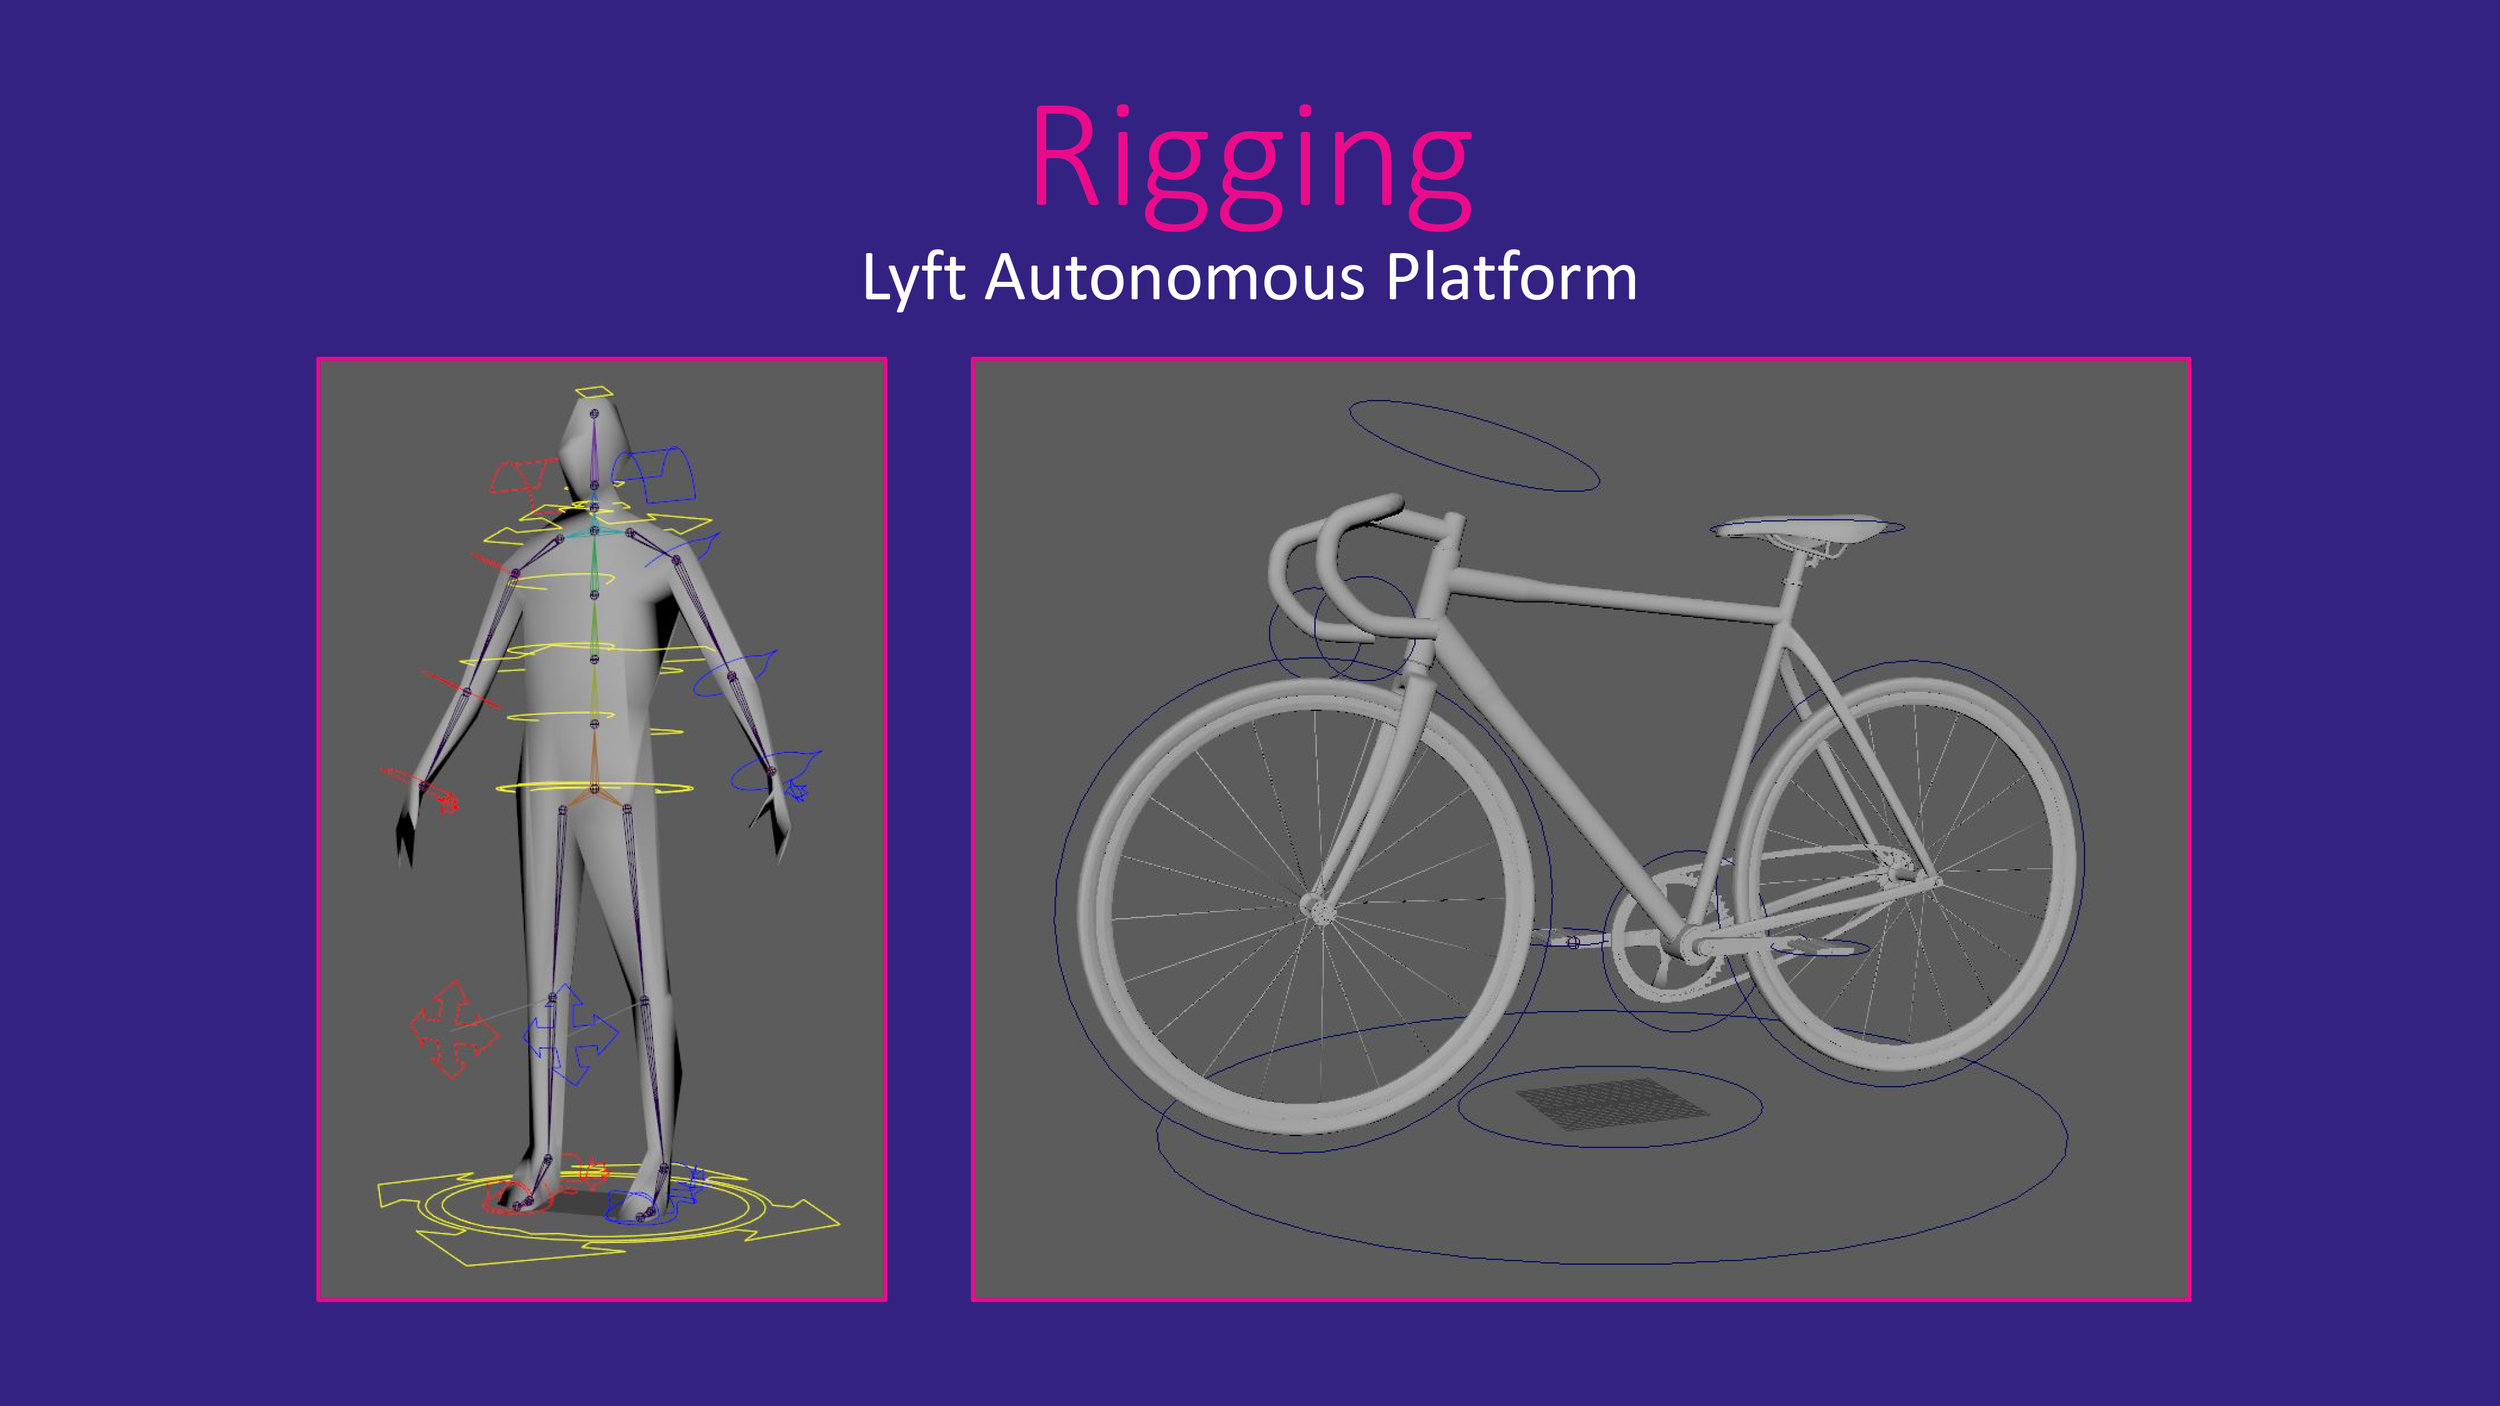
While at Spree3D, my main focus was on animation—more specifically, on hyper-realistic motion. The goal, as I understood it, was to reach a significant milestone: to create a cutting-edge, ultra-realistic avatar system that could be used seamlessly with 3D clothing, including full cloth simulation, and integrated into a mobile app, as well as being capable of integration into other game engines, third-party apps, and digital business ventures.
Working with the AI team, members were able to create a hybrid approach, mapping a 2D user's face onto the user's 3D avatar choice. Animation was responsible for all motion; face and body animation drove all movement and informed the 2D AI facial animation. Using Unreal Engine, the user's avatar and selected garments were textured, lit, and rendered in a pre-packaged experience, which included several camera cuts accompanied by a popular music track.
Ultimately, this workflow led to other ideas and workflows. As the 3D studio began to resolve issues, Spree3D decided to go 100 percent AI, and myself and everyone in the 3D studio were let go. As with all startups, change happens quickly, especially with the huge rush of AI in today's environment.
I learned a great deal while working with a group of extremely talented individuals at Spree3D. Being around leaders from Disney, DreamWorks, and other prestigious studios, I grew exponentially as an artist and as a leader within my own team.
This page will offer a concise overview of the workflows and processes I devised to guarantee that the Animation department not only met but surpassed expectations while collaborating with modeling, simulation, layout, AI, and UE/Rendering. Additionally, I will showcase my contributions to other areas that helped establish benchmarks in Character art. These contributions encompassed modeling recommendations, skin creation, and hair/groom workflows.
With the vast diversity in how a particular size can appear on a woman, gathering as much reference material as possible was crucial. Several weeks spent searching for and ingesting references helped guide to key areas that ultimately found their way onto our models.
Creating an “attractive” full-body model was a huge challenge. Staying faithful to ASTM measurements, adhering to the limitations for the optimal resolution of the mesh (fewer than 23,000), and balancing the garment and simulation needs, animation and deformation needs, and geometry space deformation needs—all into one rig that accommodated three different height groups with three different sizes in both an A and D breast sizes (for a total of 23 different avatars)—was critical. Moreover, the ability to apply any motion from the animation library onto this rig was supremely important.
Back view.
Creating a single Animation Rig capable of accommodating three different height groups—five feet, five feet five inches, and five feet eleven inches—each with four sizes (00, 6, 12, and 16) and providing the option for either an A or D cup breast size, along with full facial controls, was a challenging task. Working with a contract rigger, I helped develop a robust system that could output 24 unique avatars while being able to achieve excellent results in animation.
Showing the ability to size up to 16 while also changing the breast size to a D cup.
With an agile Rigging System now complete, I shifted my focus to creating an Animation system capable of taking performance capture and retargeting it to our rig as cleanly and quickly as possible. First, I selected Xsens, now known as Movella, as the studio's performance capture solution. Utilizing the Xsens MVN Link and Animate Pro software, the performance capture results were solid. The actor in question is Jorji. I had the opportunity to work with her on several captures. Her motion, as it clearly demonstrates, is a testament to her amazing talent.
The next key workflow in the Animation System was to create a retargeting process. This process would enable me to take performance capture and cleanly retarget it to the Rigging system. Knowing that the rig's bind pose was an A-pose, I needed a method to transition the rig's FBX to a zeroed-out T-pose, aligning it with Xsens' zero frame T-pose. Having a matching T-pose and ensuring that the Rig's FBX T-pose was clean set the stage for a more accurate result of the performance capture. This approach eliminated the need for numerous offset layers to correct the delta in zero frame poses between the rig and the Xsens FBX. By importing the rig's FBX into Motionbuilder, I was able to create the T-pose and set up a Source asset from the Xsens skeleton FBX. The Source asset, the Xsens FBX, would consist only of the FBX skeleton and have no keyframed animation. It would facilitate the transfer of any Xsens FBX performance capture onto the constrained skeleton of the Avatar's rig FBX. It's important to note a few tweaks in the Xsens MVN software. I made sure that each capture started at the origin and ensured that the size of the Xsens skeleton matched our medium-height rig skeleton. The rigging system's medium-height skeleton is used in all retargeting from performance captures, and the result is added into the first of two libraries—a skeletal MoCap library in Maya.
Short video example of retargeting on rig FBX.
Upon importing the FBX back into Maya, it was time to add the skeletal motion to the Animation Libraries, more specifically to the MoCap Library. The Animation Libraries that I created were all done in Studio Library. Having worked in Studio Library on other productions, I was familiar with the strengths of this great resource and knew it would be perfect for setting up the libraries on the studio's network. A custom MEL script tool would take the hip joint of the FBX skeleton and point-constrain a camera at a certain distance and height, along with a predetermined focal length, while also hiding all visible joints. With only the mesh visible, the animator would open the MoCap Library, create or select the proper folders and/or sub-folders, and save the skeletal motion into the MoCap library. The saving process in Studio Library was straightforward, allowing for either an .mp4 reference video for motion or a .jpg still frame for capturing just a pose frame. The MoCap library was primarily created as a contingency, in case the more frequently used Animation library became damaged or data was lost.
The final step of transfer involved retargeting the MoCap Library joint animation to the controls of the female rig and saving this to the Animation Library. A template Maya file, named MocapTransferToRig.ma, served as the starting point. This file included an FBX skeleton of the female rig in a T-pose and a referenced-in female rig. Upon bringing up the MoCap Library, the Animator would select a motion or pose and assign it to the FBX skeleton. With the assigned motion now baked onto the FBX skeleton, the Animator could run a custom script that would constrain the rig to the skeleton, bake the animation from the skeleton to the correct controls, delete the constraints, and finally remove the FBX skeleton from the Maya scene. What remained was the rig with animation baked onto the controls. The last step involved baking out all IK to FK controls using another custom script. Once the rig was baked with all animation to the proper FK controls, a custom script would select the appropriate controls, create a Studio Library camera, and save the motion into the Animation Library.
This Animation comes directly from the Animation Library. It has not been cleaned or plus’d by animation. This is a straight result from the procedures and workflow above.
I was presented with the challenging and exciting task of developing a photorealistic skin pipeline, specifically aimed at creating lifelike female avatars. Leveraging the advanced node-based system of Mari, coupled with the powerful rendering capabilities of Maya Arnold and Unreal Engine, I meticulously crafted a workflow that consistently produced highly believable and detailed skin textures. This technical endeavor involved a deep dive into nuanced shader development and texture layering, ensuring each avatar exhibited a natural and authentic appearance. The result was a series of strikingly realistic female avatars, each showcasing the intricate interplay of light and texture that truly brought them to life.
I was tasked with producing asset renders for the website. Following specific guidelines and using reference images as a basis, I efficiently delivered high-quality, photorealistic imagery that met the project's requirements.
My responsibility involved revising the Male Avatar models, with a focus on establishing a visual benchmark for the ideal Male Avatar. I utilized the 7 1/2 head size ratio as a foundational guide for building accurate proportions. By meticulously adjusting proportions and details, I aimed to enhance the realism and authenticity of the Male Avatar.
Proportions, detail and size were all adjusted. using Zbrush and Maya these changes were made to better align all sizes and shapes of the Male Avatar.
These short stories were a cost-effective way to build Spree3D's brand on social media, engage with customers, and analyze metrics to inform decisions in creating a successful product. All animation was completed either through motion capture and cleanup or hand-keyed animation. The delivery for these five spots overlapped, making it imperative to have a fast, efficient system that delivered on time and met our expectations for direction and quality of animation.
Lego Brawls was released by Red Games in September 2019 and is available exclusively on Apple TV. I was brought on to head animation and all rigging. This was my first gig in which I was head for both animation and rigging. I learned so much and continue to grow off this knowledge. The biggest keys I took away are 1) In games you are a Co-Collaborator - you work hand-in-hand with Designers, Programmers and Directors. 2) Its about making the best game play animation 3) You are being hired to bring a motion mindset to solving problems and last and most important 4) Make it enjoyable - in game and with your team! Look for more animations in attack and hit reactions in the near future.
LEGO Brawls: Minifig Run Cycle
Responsible for Animation and Rigging.
The Outpost is an American fantasy-adventure drama television series, acquired by The CW, which premiered on July 10, 2018. I was hired by Blufire Studios and Head of Animation/TD, David Gibb, to help out with animation. Using both hand animation and sometimes mocap, Dave and I successfully completed over fifty shots in under three weeks. There were many constraints, time being the biggest. But also having to work within the allotted frames and having to physically cover green suit with our animation was tough. Dave and the team at Blufire are a small team but woo - they can pump stuff out! I had a great time and hopefully we’ll do it again! Well, hopefully this time we’ll have more time? Cheers!
This piece was originally designed as a competition piece Red Bull - Art of the Can motion graphic and also was given special consideration to play during a gallery showing in Philadelphia for Red Bull - Art of the Can. I worked as a Co-Director on this project and specifically headed animation and rigging. I really enjoyed working with my friend Eli Guerron, the synergy created with what he can bring to the table really fuels my passion to deliver great work.
Plan B Studios in Peru hired me to co-direct and animate on this great commercial for ISIL University in Peru. Being able to direct all aspects from concept/story, modeling, rigging, look dev and final animation was a truly unique experience. The team there at Plan B made this a super fun and rewarding project. This highly stylized spot was a blast to work on and really came together and showed a lot of character.
Hotel Transylvania 3 was released summer 2018. Ignite Studios hired me to model, rig and animate on Drac, Mavis and Blobby. There was definitely some challenges with this project. Really low poly counts, low bone counts and 20 second animation loops all done within a month. My animation for this project ended up with the Mavis dance cycle and a short clip of Blobby.
Carnival Games VR was released November 2016, by 2K Games. 2K Games contracted out their popular Carnival Games to Wahoo Studios to turn it into a fully immersive VR game. I was hired by Wahoo Studios to head all animation and rigging. First big note - a complete redo on the Barker. I was in charge of creating a new rigging system for Barker, using the CAT system in 3DS Max, to facilitate the new design while still being able to take on old animation and new animation alike. A lot of the animation was recycled, with a bit of arm twisting, but new animations with Barker, animals, robots, ghosts, games inanimate objects were all created in making this game come to life. While my main duties were all things animated and rigged, I also helped out with modeling, lighting, particle FX systems and last UI and UX design and implementation. The crew at Wahoo was amazing and really talented and the Carnival Games VR game was a blast to work on.
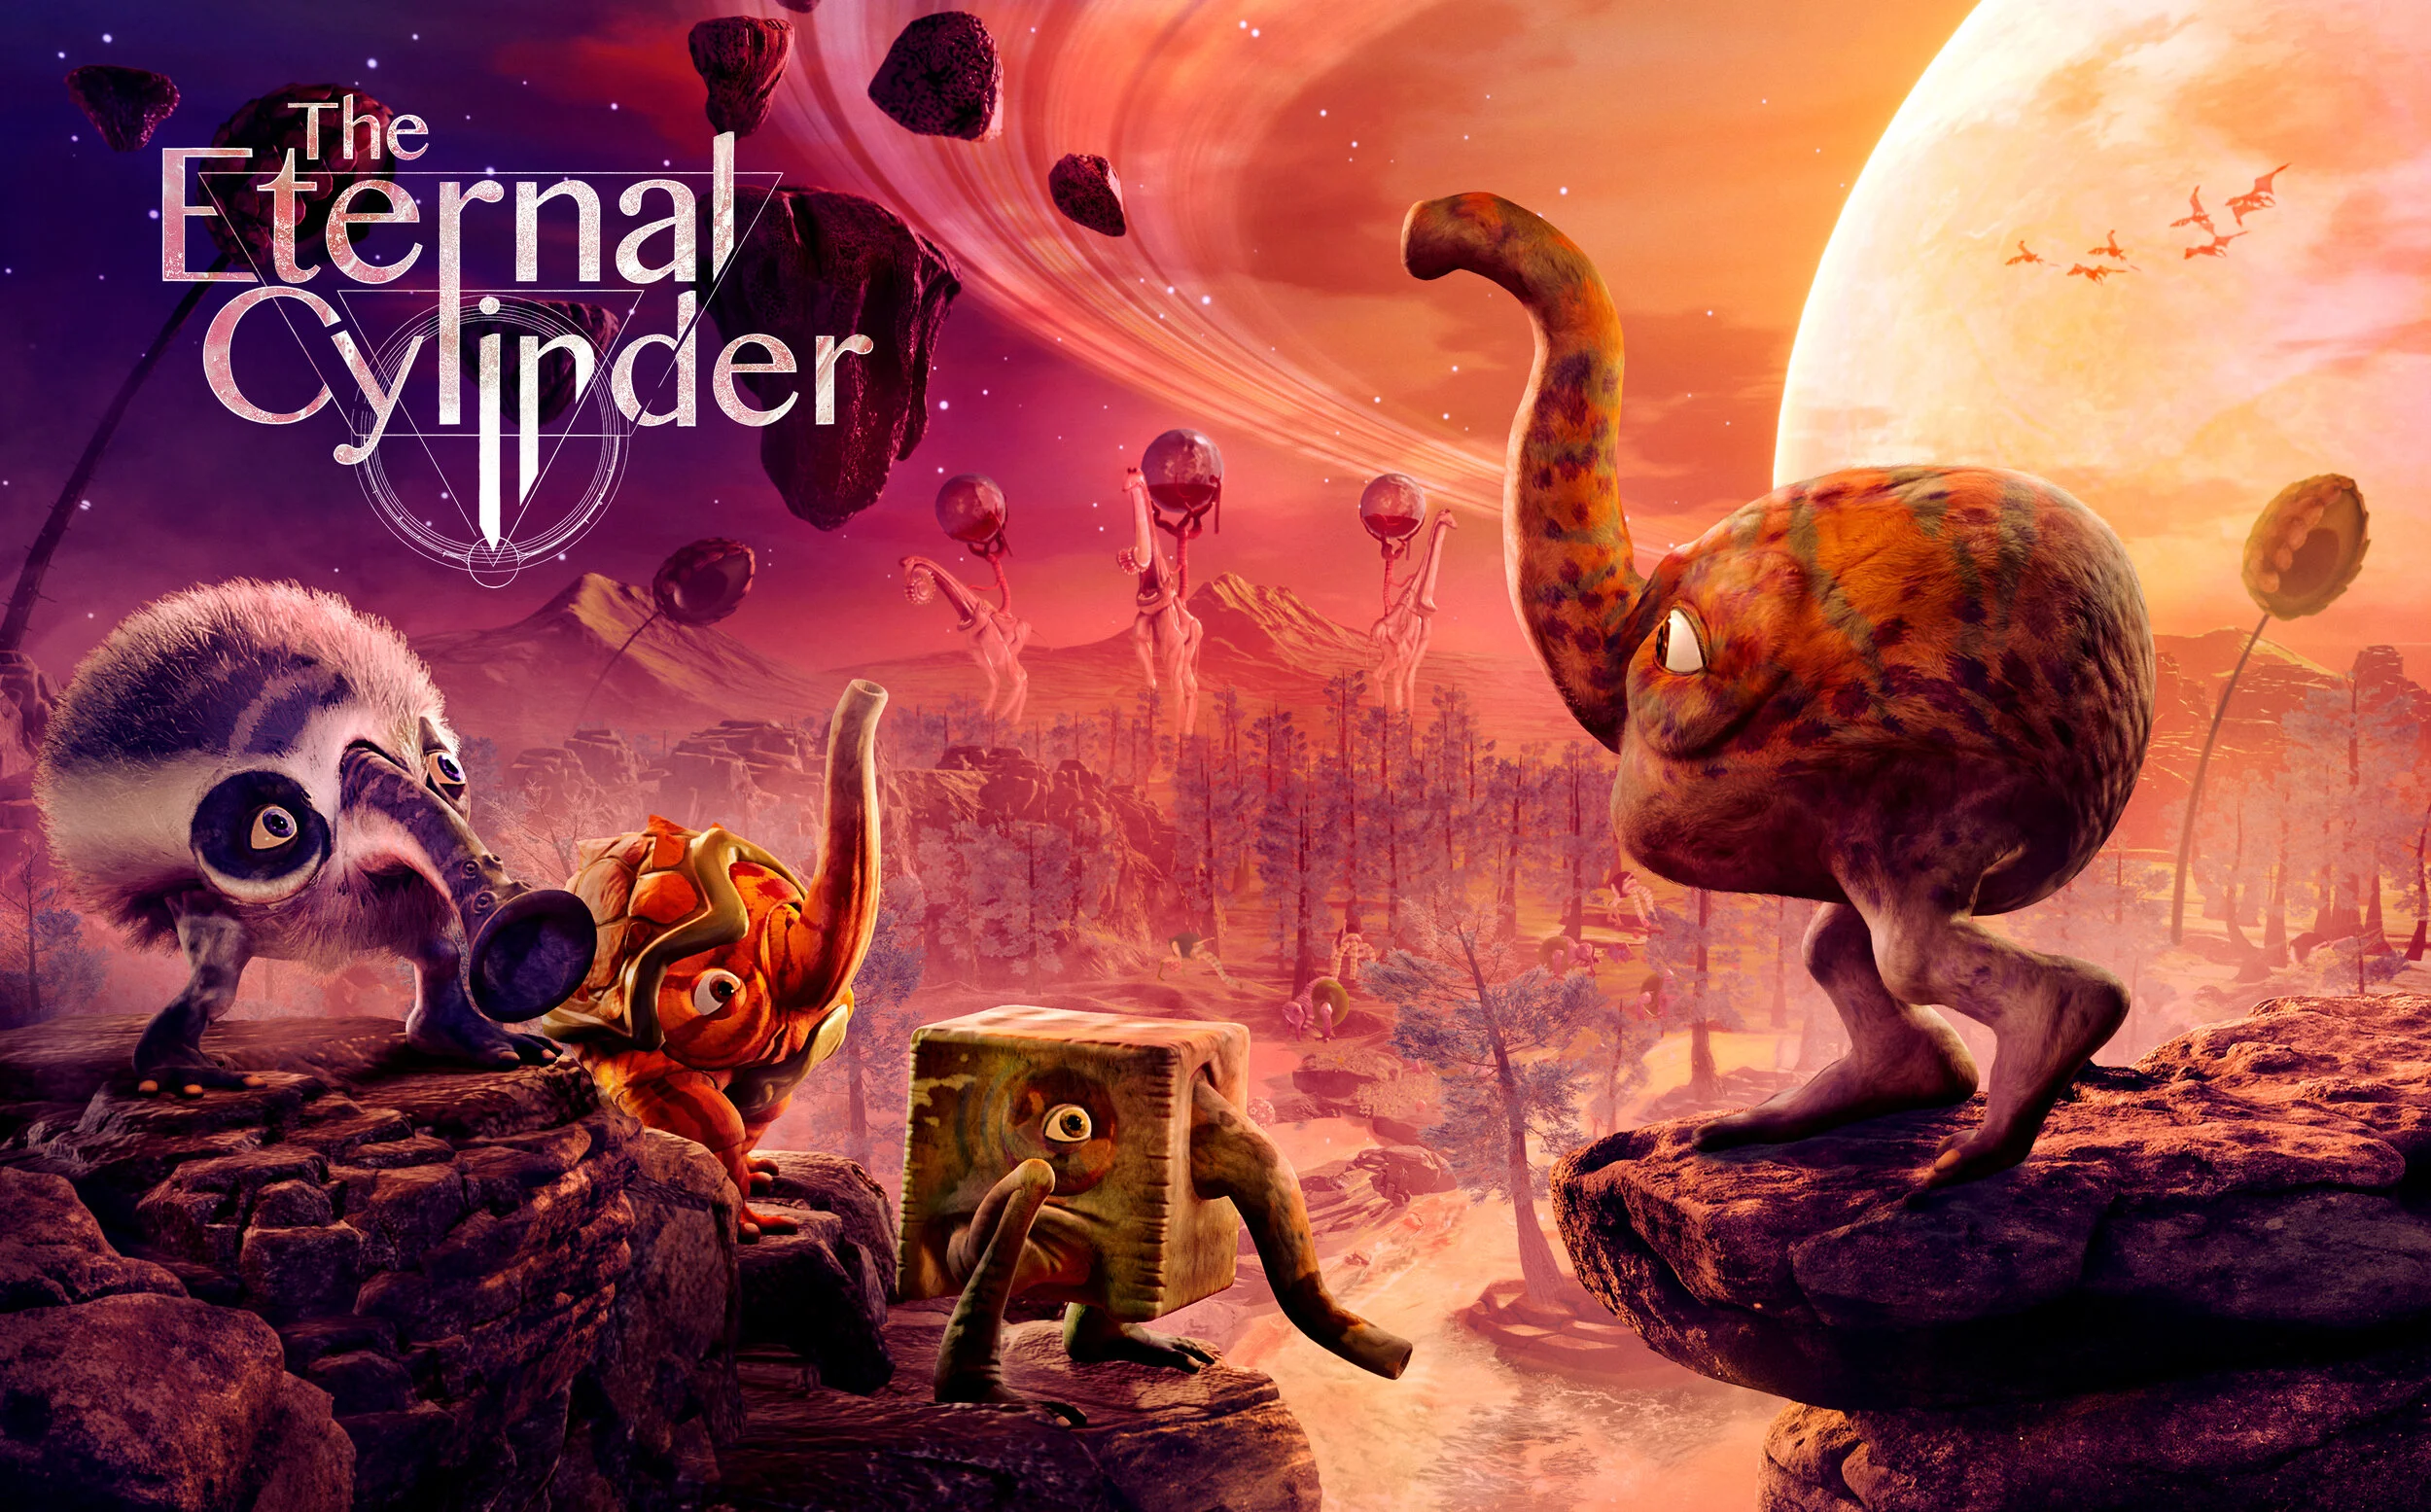
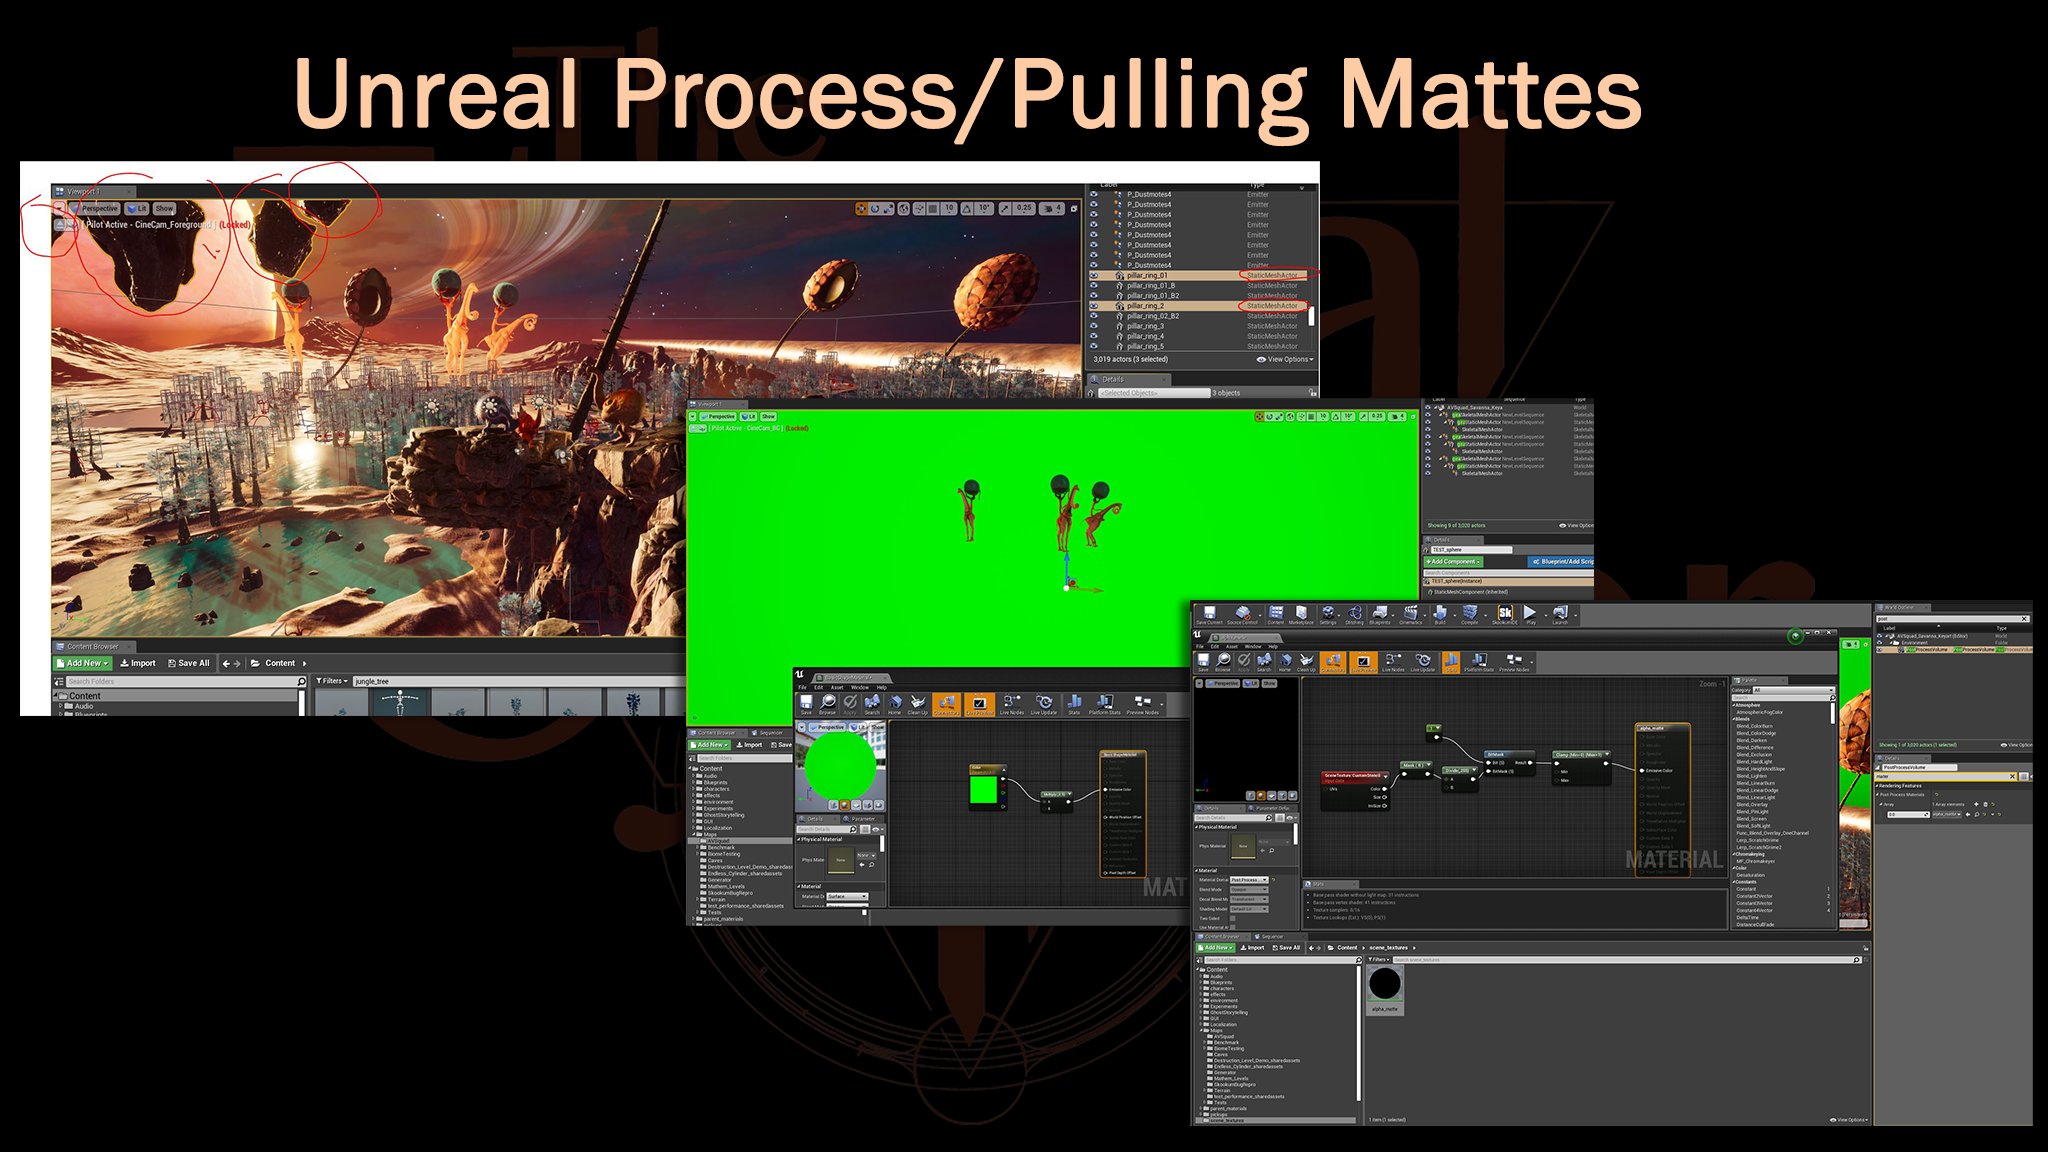
In The Eternal Cylinder, players control a herd of creatures called Trebhums and must explore a strange alien world filled with exotic lifeforms, surreal environments, and the constant threat of the Cylinder. Lonnie Silberling brought me on to help execute his Key Art vision for this great game. Working with the Developer ACE Studios we were able to deliver Lonniie’s vision to the client successfully.
This is the final Key Art that was delivered to the client. My contributions were to supply all the assets - fully rendered and posed so that Lonnie could work his magic.